
If you’ve ever searched “how to make a flower wall,” you’ve probably seen dozens of tutorials with silk flowers from Michaels, hot glue guns, and plastic pegboards. And while those DIYs can be fun, let’s be honest—they often turn out a little underwhelming.
As the founder of a flower wall brand, I get asked about this all the time. So I wanted to show you how we make our professional-grade flower walls at Once Upon a Blossom. Even if you're just doing a small DIY version, learning the basic structure, layering techniques, and color theory can help take your design from flat to fabulous.
🧵 What We Start With
We don’t use foam panels or plastic boards. Our walls begin with a custom-made curtain-style base made from a durable polyester-cotton blend. It's flexible, breathable, and strong enough to hold thousands of flowers. Each 8x8 ft panel connects with premium YKK zippers so they install easily and stay secure.
If you're building your own, you can use heavy cloth or even canvas as your base. You'll also need:
-
Hot glue & glue gun
-
Flowers of your choice (ideally a variety of sizes, colors, and textures)
Whether you’re working with silk roses or foam peonies, make sure your flowers feel lifelike and hold their shape.


Step 1: Choose Your Color Palette
Before gluing a single flower, step back and think about color. A great flower wall starts with a cohesive palette—not just picking random favorites, but curating a mix that flows naturally.
In Floret Farm’s A Year in Flowers, Erin Benzakein talks about how great arrangements are built from three core elements:
-
Base greens for shape and volume
-
Primary blooms for color and personality
-
Delicate highlights to add sparkle and movement
These principles don’t just apply to bouquets—we use them in all our flower wall designs.
There are also helpful color strategies:
-
Monochromatic: different shades of the same color (like soft pink to hot pink)
-
Analogous: colors next to each other on the wheel (like red, purple, magenta)
Lay your flowers out first to preview the vibe. You’ll instantly see what works and what clashes.
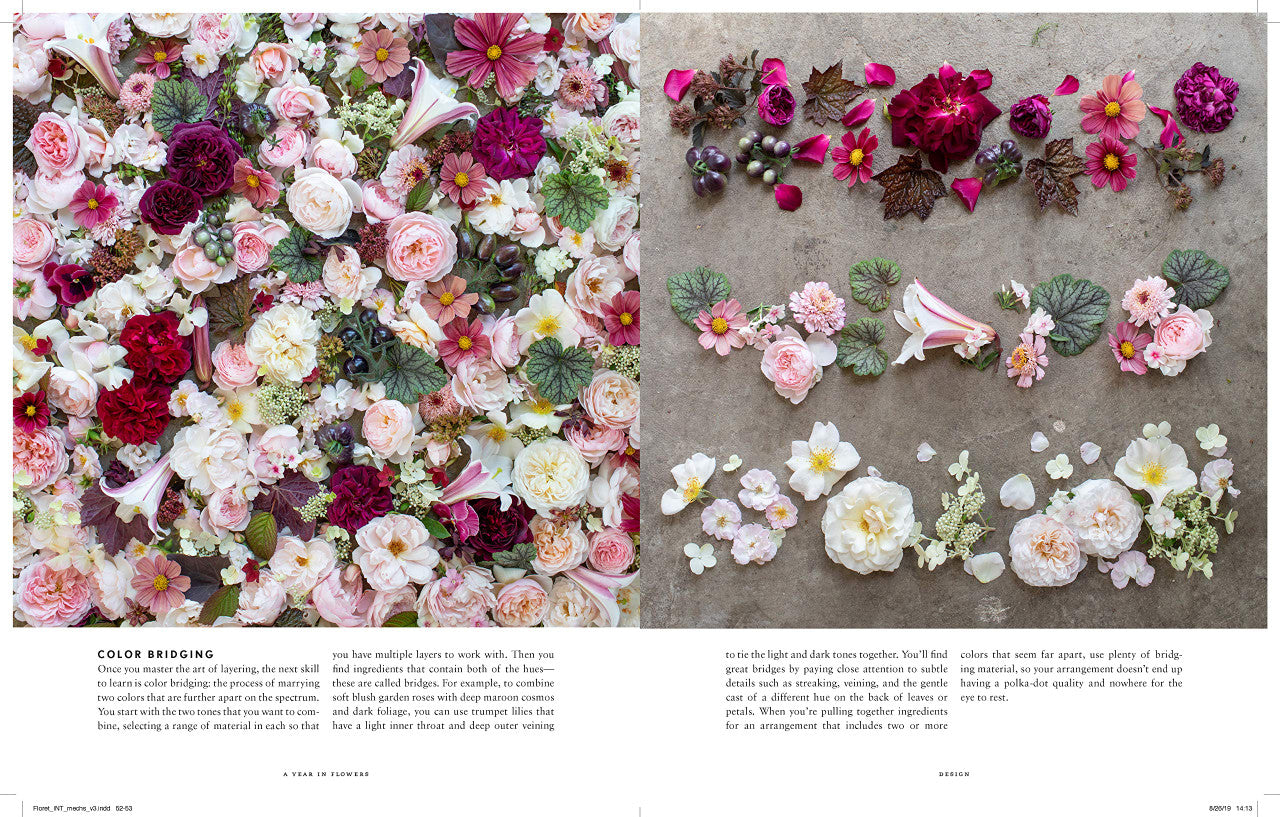
Source: Floret Farm’s A Year in Flowers
If you're building your own wall, take a cue from nature. Lay your flowers out on the floor or a foam board to preview the palette. You’ll instantly spot combinations that clash or feel too “flat.”
Source: Unsplash
Step 2: Design the Vision on Foam
Before we build anything on the real base, we always start with a sample on a foam board. This step helps us visualize the color palette, experiment with layering, and lock in the overall mood and composition of the flower wall.
We try different combinations of flowers—playing with size, shape, and color—to make sure the final look feels cohesive, balanced, and full of life. It’s like a floral sketch before the masterpiece.
This part is crucial. Without a clear plan, it’s easy to overdo it or end up with a wall that feels flat or chaotic.
For our Summer Sangria flower wall, we used an analogous palette of deep red, purple, hot pink, and soft blush—a bold, saturated combination that feels lush and energetic.


Step 3: Build the Leafy Foundation
Now we start the actual build. Every one of our flower walls begins with greenery. We use dense artificial leaves to create depth, dimension, and a natural-looking base before adding any flowers. Think of this as your canvas.
We start by hand-placing clover-shaped greenery, one by one, to create a lush base layer. Then we add larger green leaves to fill any gaps and soften the texture. This step makes the entire wall feel full and vibrant—even before a single flower goes on.


Step 4: Add the Primary Flowers
Next, we add our main color palette. For example, in our Summer Sangria flower wall, that includes deep reds, purples, hot pinks, and muted pinks. These are the bold, showy flowers that define the wall’s overall vibe.
Each flower is hand-glued. But we don’t just stick them directly to the base—we glue stems to flowers, wire them for shape, and then attach the wired stems to the base. This gives better structure, flexibility, and realism.


Step 5: Play the Layer Game
Now it’s time to bring your flower wall to life—literally. This is where we start playing with depth and dimension.
Instead of gluing everything flat, we intentionally place flowers at different heights to create a more natural, luxurious look. Think of it like a floral topography:
-
Purple blooms sit slightly higher than the red
-
Pink florals float above the purple
-
And so on…


This layering technique adds shadow, texture, and richness—so the wall doesn’t look like a flat sheet of color, but a real blooming moment.
We use wired stems to give each flower structure, and adjust their angle and elevation by hand.
Step 6: Add the Highlights
This is our secret weapon.
We finish every wall with hundreds of tiny highlight flowers—white, green, blush—to break up the dominant colors and create contrast.
These accents sit at the highest layer, catching the light and pulling the whole wall together.
On Summer Sangria, for example, we added soft green hydrangeas to soften the bolder colors and create a more natural flow.
Don't skip this step—these little flowers often make the biggest difference.


Step 7: Hang It Up
Once everything is in place, we use our zipper connection system to assemble each panel. Then we hang the wall on a pipe-and-drape setup or mounting frame.
We double-check for gaps, fill in any sparse areas, and give the whole thing a final once-over.

And that’s it—a complete flower wall, built to last and ready for its close-up.

💬 Final Thoughts: Whether You DIY or Buy
We know DIY can be fun, and if you want to build your own flower wall, this process gives you a strong foundation.
But if you ever feel overwhelmed—if gluing 2,300 flowers by hand doesn’t sound like your thing—we’re here.
At Once Upon a Blossom, every wall is handcrafted, layered for depth, and designed with care. If you want to skip the trial and error and just get it right, we’d love to help.
✨ Watch the full behind-the-scenes flower wall build on TikTok
📍 Shop Our Flower Walls
Thanks for reading!

